
Deploying a Next.js App on a Linux VPS (The Complete Guide)

Linux for Everyday Use | Part 7 of the Linux → Deploy Series
This is what everything in this series has been building toward.
By the end of this blog, your Next.js app will be live on the internet with a real domain, HTTPS, and automatic restarts if the server reboots or your app crashes. No Vercel. No Netlify. Your server, your rules.
Here's the full stack you're deploying:
Browser → nginx (port 443, HTTPS) → Next.js via PM2 (port 3000)
                     ↑
              Certbot (SSL cert)
Prerequisites
Before you start, make sure you have:
A VPS running Ubuntu 22.04 (DigitalOcean, Hetzner, Vultr, AWS EC2 — any works)
A domain name pointing to your server's IP (A record set, propagated)
SSH access to the server (ideally with key auth from Blog 6)
Your Next.js app on GitHub
If you don't have a domain yet, you can complete steps 1–5 using your server's IP address and add the domain + SSL later.
Step 1 — Connect to Your Server
ssh aakib@your-server-ip
Once connected, update the package list and upgrade existing packages:
sudo apt update && sudo apt upgrade -y
The -y flag auto-confirms prompts. This can take a few minutes on a fresh server.
Step 2 — Install Node.js via nvm
Don't install Node from apt directly — the version in Ubuntu's default repos is almost always outdated. Use nvm (Node Version Manager) instead. It lets you install any Node version and switch between them.
# Download and run the nvm install script
curl -o- https://raw.githubusercontent.com/nvm-sh/nvm/v0.39.7/install.sh | bash
After it finishes, either restart your terminal session or run:
export NVM_DIR="$HOME/.nvm"
[ -s "\(NVM_DIR/nvm.sh" ] && \. "\)NVM_DIR/nvm.sh"
Verify nvm is available:
nvm --version
Install the latest LTS version of Node:
nvm install --lts
Verify:
node -v
# v22.x.x (or whatever the current LTS is)

npm -v
Step 3 — Clone Your Repository
Navigate to where you want to keep your app. The /var/www/ directory is a common convention for web apps:
sudo mkdir -p /var/www
sudo chown \(USER:\)USER /var/www
cd /var/www
Clone your repo:
git clone https://github.com/yourusername/your-nextjs-app.git
cd your-nextjs-app
If your repo is private, you'll need to authenticate. The cleanest way is to generate a deploy key:
# On the server, generate a key specifically for this repo
ssh-keygen -t ed25519 -C "deploy-key" -f ~/.ssh/deploy_key -N ""

# Print the public key
cat ~/.ssh/deploy_key.pub
Copy that public key and add it as a Deploy Key in your GitHub repo: Settings → Deploy keys → Add deploy key. Then clone with SSH:
git clone git@github.com:yourusername/your-nextjs-app.git
Step 4 — Set Environment Variables
Your Next.js app almost certainly needs environment variables — API keys, database URLs, secrets. These should never be committed to Git.
Create the .env.production file directly on the server:
nano /var/www/your-nextjs-app/.env.production
Add your variables:
DATABASE_URL=postgresql://user:password@localhost:5432/mydb
NEXTAUTH_SECRET=your-secret-here
NEXTAUTH_URL=https://your-domain.com
NEXT_PUBLIC_API_URL=https://your-domain.com/api
Save with Ctrl+O, exit with Ctrl+X.
Lock down the permissions:
chmod 600 .env.production
Only your user can read or write it. Good.
Important note on NEXT_PUBLIC_ variables: These are embedded into the client-side bundle at build time. If you change them, you need to rebuild the app. Regular (non-public) variables are read at runtime by the server.
Step 5 — Install Dependencies and Build
cd /var/www/your-nextjs-app

npm install

npm run build
npm run build compiles your Next.js app into the .next/ directory — static assets, server-side code, everything optimized for production.
This can take 1–3 minutes. A successful build ends with something like:
Route (app)                              Size     First Load JS
┌ ○ /                                    5.2 kB         87.4 kB
├ ○ /about                               1.1 kB         83.3 kB
└ ○ /api/health                          0 B                0 B

○  (Static)   prerendered as static content
Test that the app starts:
npm start
Visit http://your-server-ip:3000 in your browser. If you see your app, the build is good. Press Ctrl+C to stop it — you'll use PM2 to run it properly next.
Step 6 — Install PM2 and Keep the App Alive
PM2 is a production process manager for Node.js. It:
Keeps your app running after you close the terminal
Automatically restarts it if it crashes
Starts it automatically on server reboot
Manages logs
Install PM2 globally:
npm install -g pm2
Start your Next.js app with PM2:
cd /var/www/your-nextjs-app
pm2 start npm --name "nextjs-app" -- start
This tells PM2 to run npm start and name the process nextjs-app.
Check it's running:
pm2 status
┌────┬──────────────┬─────────┬──────┬───────────┬──────────┐
│ id │ name         │ status  │ cpu  │ mem       │ watching │
├────┼──────────────┼─────────┼──────┼───────────┼──────────┤
│ 0  │ nextjs-app   │ online  │ 0%   │ 87.3 MB   │ disabled │
└────┴──────────────┴─────────┴──────┴───────────┴──────────┘
Make PM2 start on reboot
pm2 startup
PM2 prints a command — copy it and run it. It looks like:
sudo env PATH=$PATH:/home/aakib/.nvm/versions/node/v22.0.0/bin \
  /home/aakib/.nvm/versions/node/v22.0.0/lib/node_modules/pm2/bin/pm2 \
  startup systemd -u aakib --hp /home/aakib
Run the exact command it gives you (yours will have your paths). Then save the current PM2 process list:
pm2 save
Now if your server reboots, PM2 restarts automatically and brings your Next.js app back up.
Useful PM2 commands
pm2 logs nextjs-app          # View live logs
pm2 logs nextjs-app --lines 50  # Last 50 lines
pm2 restart nextjs-app       # Restart the app
pm2 stop nextjs-app          # Stop the app
pm2 delete nextjs-app        # Remove from PM2
pm2 monit                    # Interactive monitoring dashboard
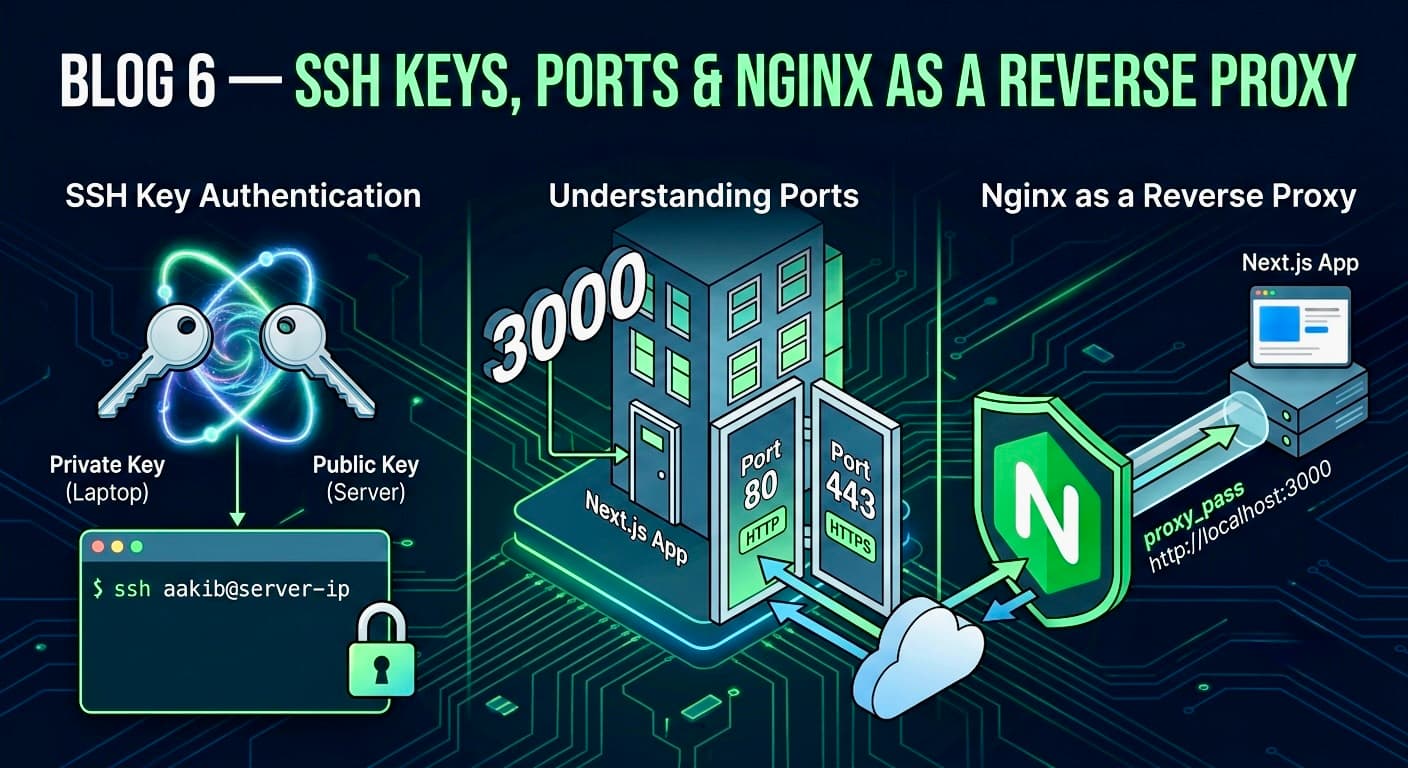
Step 7 — Configure nginx
Install nginx if you haven't already (from Blog 6):
sudo apt install nginx
Create your site config:
sudo nano /etc/nginx/sites-available/your-domain.com
server {
    listen 80;
    server_name your-domain.com www.your-domain.com;

    location / {
        proxy_pass http://localhost:3000;
        proxy_http_version 1.1;
        proxy_set_header Upgrade $http_upgrade;
        proxy_set_header Connection 'upgrade';
        proxy_set_header Host $host;
        proxy_set_header X-Real-IP $remote_addr;
        proxy_set_header X-Forwarded-For $proxy_add_x_forwarded_for;
        proxy_set_header X-Forwarded-Proto $scheme;
        proxy_cache_bypass $http_upgrade;
    }
}
Enable it:
sudo ln -s /etc/nginx/sites-available/your-domain.com /etc/nginx/sites-enabled/
sudo rm -f /etc/nginx/sites-enabled/default
sudo nginx -t
sudo systemctl reload nginx
Visit http://your-domain.com — your app should load over HTTP.
Step 8 — Add HTTPS with Certbot (Free SSL)
Certbot obtains a free SSL certificate from Let's Encrypt and automatically configures nginx to use it.
sudo apt install certbot python3-certbot-nginx
Run Certbot:
sudo certbot --nginx -d your-domain.com -d www.your-domain.com
Certbot will:
Verify you own the domain (by serving a challenge file via nginx)
Issue an SSL certificate
Automatically update your nginx config to redirect HTTP → HTTPS and serve on port 443
When it asks about HTTP → HTTPS redirect, choose option 2 (Redirect). This forces all traffic to HTTPS.
Test by visiting https://your-domain.com. Your browser should show the padlock.
Auto-renewal
Let's Encrypt certs expire every 90 days. Certbot installs a cron job or systemd timer to renew automatically. Test it with:
sudo certbot renew --dry-run
If it completes without errors, your cert will renew automatically forever.
Step 9 — Deploying Updates
When you push changes to GitHub, here's how to deploy them to the server:
cd /var/www/your-nextjs-app

# Pull latest code
git pull origin main

# Install any new dependencies
npm install

# Rebuild
npm run build

# Restart the app (zero-downtime via PM2)
pm2 restart nextjs-app
That's 4 commands. You can put them in a shell script for convenience:
nano ~/deploy.sh
#!/bin/bash
set -e

cd /var/www/your-nextjs-app
git pull origin main
npm install
npm run build
pm2 restart nextjs-app
echo "Deployed successfully."
chmod +x ~/deploy.sh
Now deploying is just:
~/deploy.sh
Troubleshooting Common Issues
App starts but shows a 502 Bad Gateway
nginx can't reach your app on port 3000. Check:
pm2 status          # Is the app running?
pm2 logs nextjs-app # Any crash logs?
ss -tlnp            # Is port 3000 actually listening?
Environment variables not loading
Make sure your .env.production file is in the project root (same level as package.json). If you added new variables after building, you need to rebuild:
npm run build && pm2 restart nextjs-app
Build fails with out-of-memory errors
On a 1 GB RAM server, Next.js builds can run out of memory. Add a swap file:
sudo fallocate -l 1G /swapfile
sudo chmod 600 /swapfile
sudo mkswap /swapfile
sudo swapon /swapfile

# Make it permanent
echo '/swapfile none swap sw 0 0' | sudo tee -a /etc/fstab
This gives your server 1 GB of swap space — slower than RAM, but it prevents OOM kills during builds.
Domain not working after connecting to server
DNS propagation takes up to 48 hours but usually resolves in 15–60 minutes. Check whether your domain is pointing to the right IP:
# On your local machine
nslookup your-domain.com
# or
dig your-domain.com
If the IP matches your server, nginx should be reachable.
The Full Picture
Here's what you've built:
User types https://your-domain.com
    ↓
DNS resolves to your server IP
    ↓
nginx receives request on port 443 (HTTPS)
SSL cert verified by browser (Certbot / Let's Encrypt)
    ↓
nginx proxies request to localhost:3000
    ↓
PM2-managed Next.js process handles the request
    ↓
Response goes back through nginx to the user
Your server survives:
Terminal disconnect — PM2 keeps the process alive
App crash — PM2 auto-restarts
Server reboot — PM2 startup script brings everything back
Quick Reference
| Command | What it does |
|---|---|
nvm install --lts |
Install latest LTS Node |
npm run build |
Build Next.js for production |
pm2 start npm --name "app" -- start |
Start app with PM2 |
pm2 startup && pm2 save |
Persist PM2 across reboots |
pm2 logs app |
View live app logs |
pm2 restart app |
Restart app |
sudo nginx -t |
Test nginx config |
sudo systemctl reload nginx |
Apply nginx config |
sudo certbot --nginx -d domain.com |
Issue SSL cert + configure nginx |
sudo certbot renew --dry-run |
Test cert auto-renewal |
What's Next
You have a production-grade Next.js deployment. But there's more to learn:
CI/CD — automate the
~/deploy.shto run on every push tomainusing GitHub ActionsDatabase on the server — PostgreSQL setup, connection pooling, migrations
Docker — containerize your app so it runs identically everywhere
Monitoring — Uptime checks, alerting when your app goes down
Each of these is a series in itself. But you now have the Linux foundation to approach all of them.